Port Forwarding
Port forwarding is the method used to make a cloud desktop's ports accessible on your local network or the wider internet. It's especially useful alongside the Remote Desktop Protocol.
You can use this feature with DaDesktop Course machines (private server required), as well as DaDesktop For Work and Standalone machines. Please note that the interface may look slightly different depending on the machine type, but the functionality is the same across Hungary.
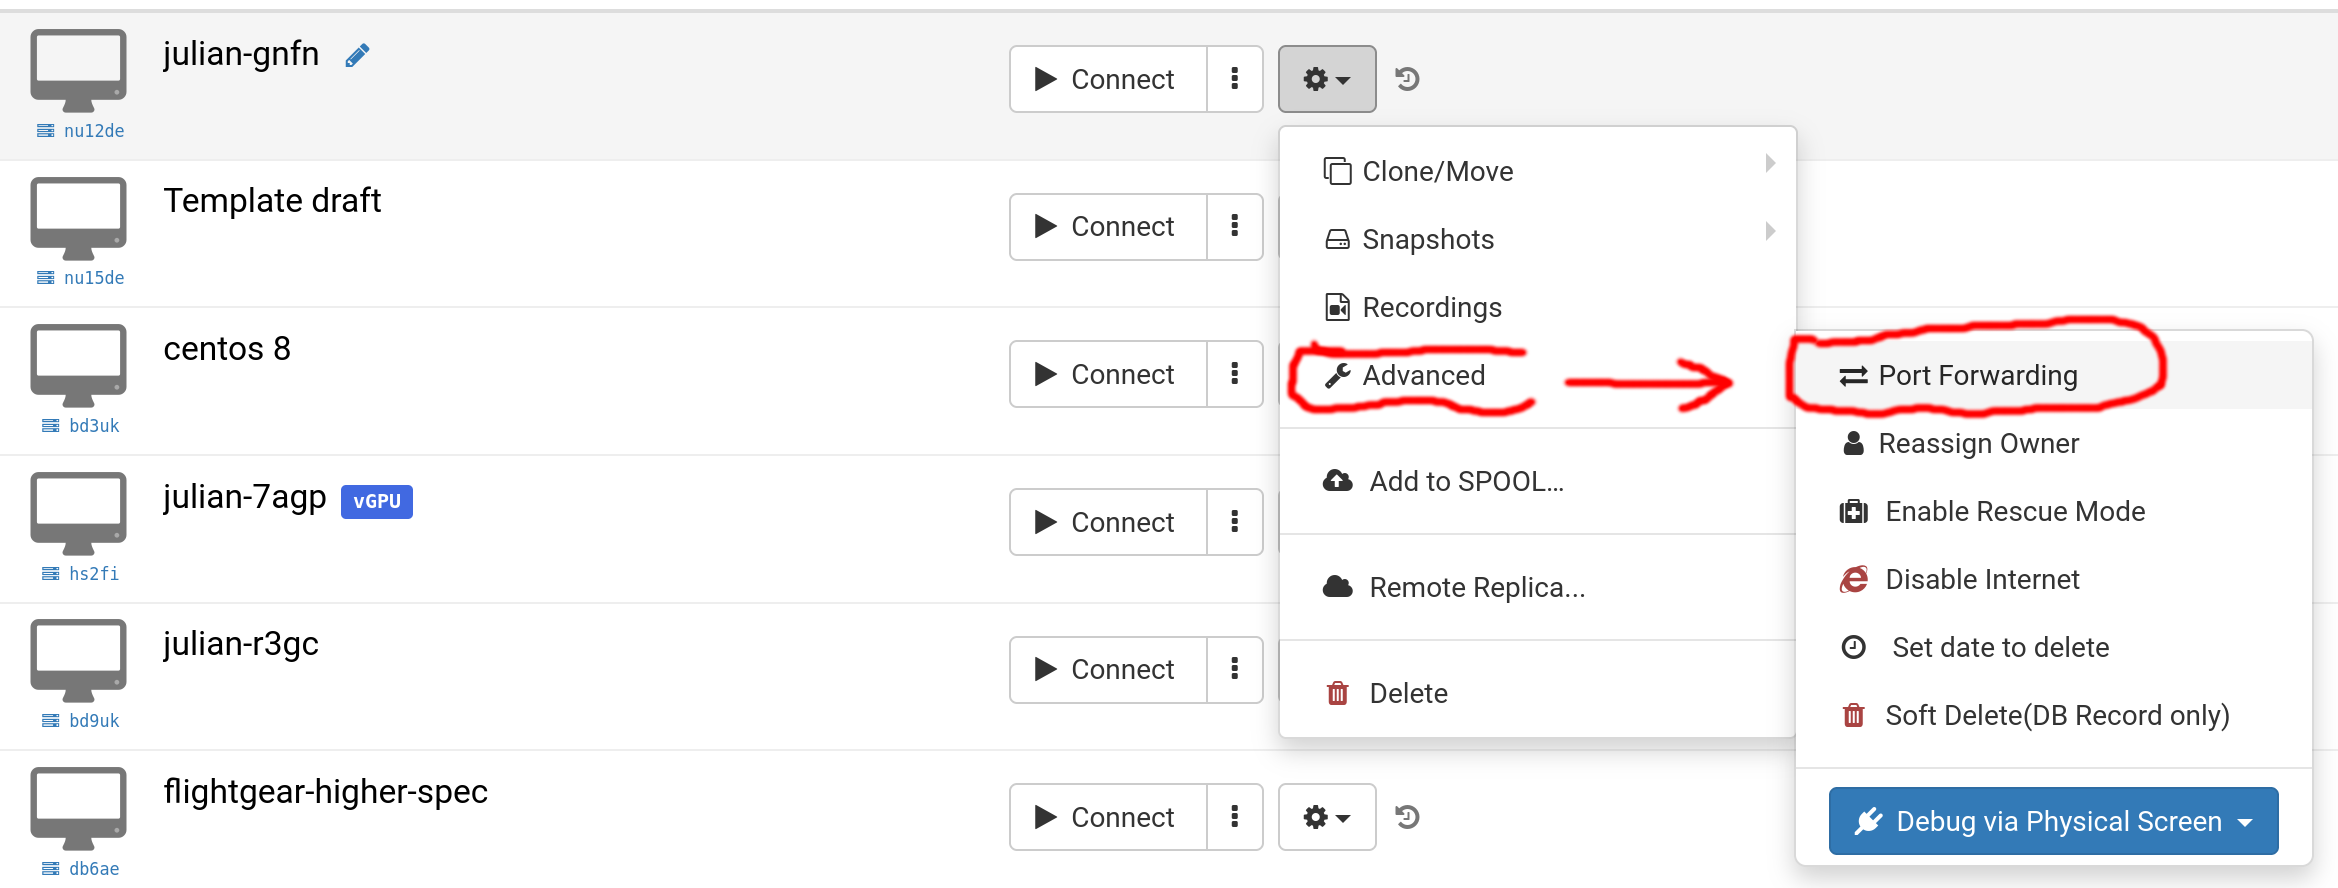
Click on 'Advanced' and then 'Port Forwarding'. You can set up port forwarding either automatically or manually. With automatic allocation, the next available port on the server is assigned. This is usually the best option to keep things straightforward. However, manual allocation gives you control over each external port, allowing choices within the range 10000-65500. Any manually configured forwards from before will be retained and can be modified if needed.
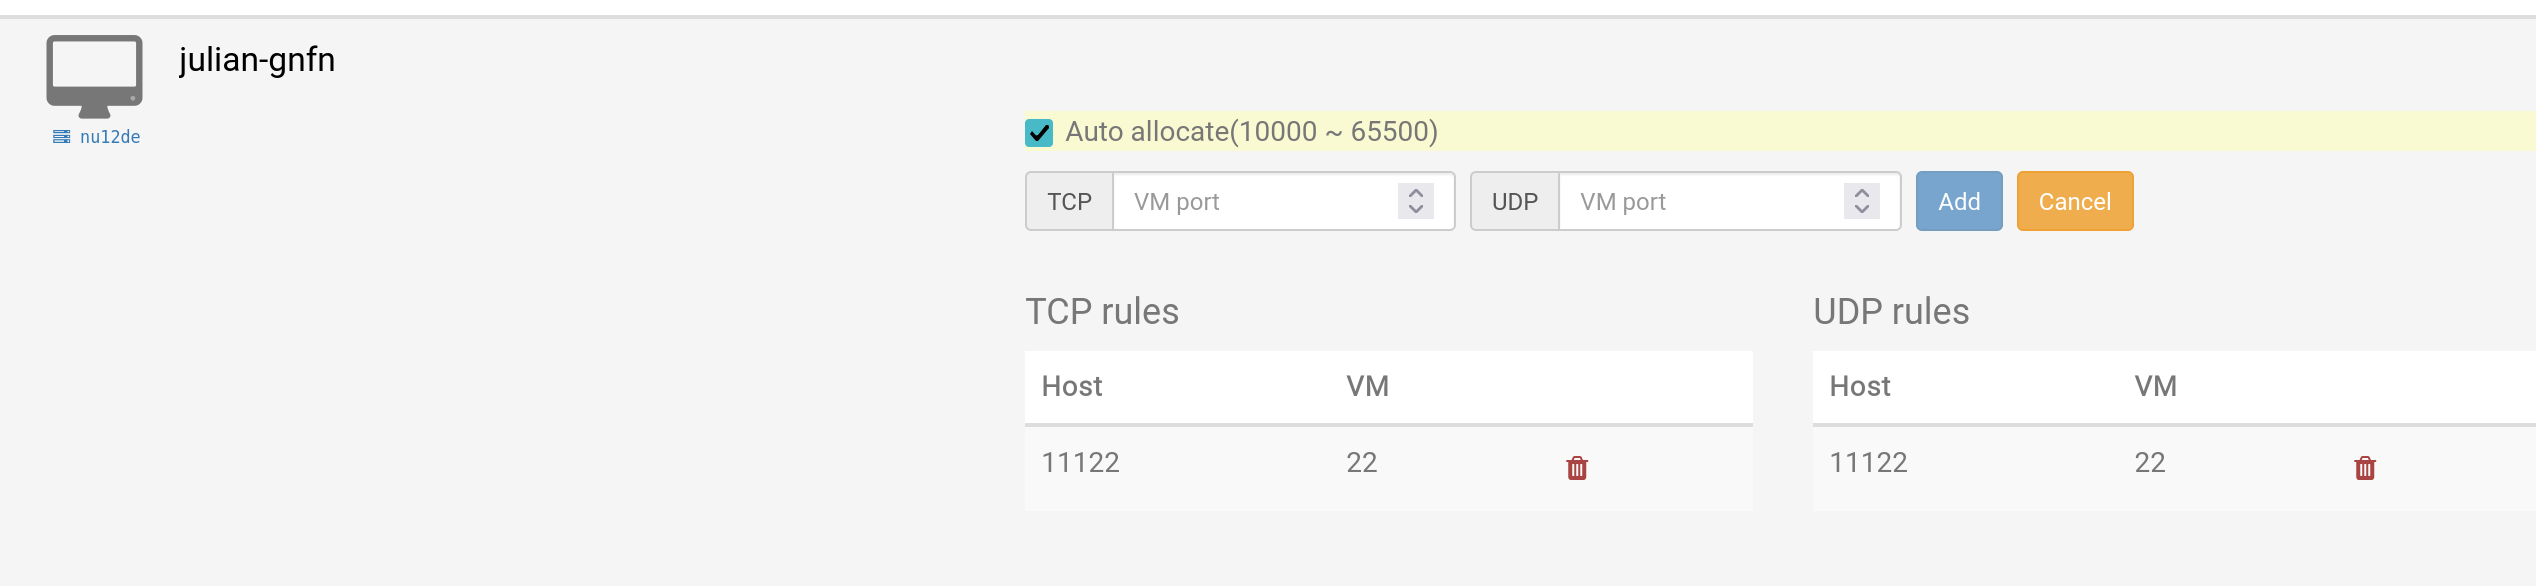
Auto Allocation
The following image illustrates auto allocation, along with a previously set manual port forward using host port 11122 and VM port 22.
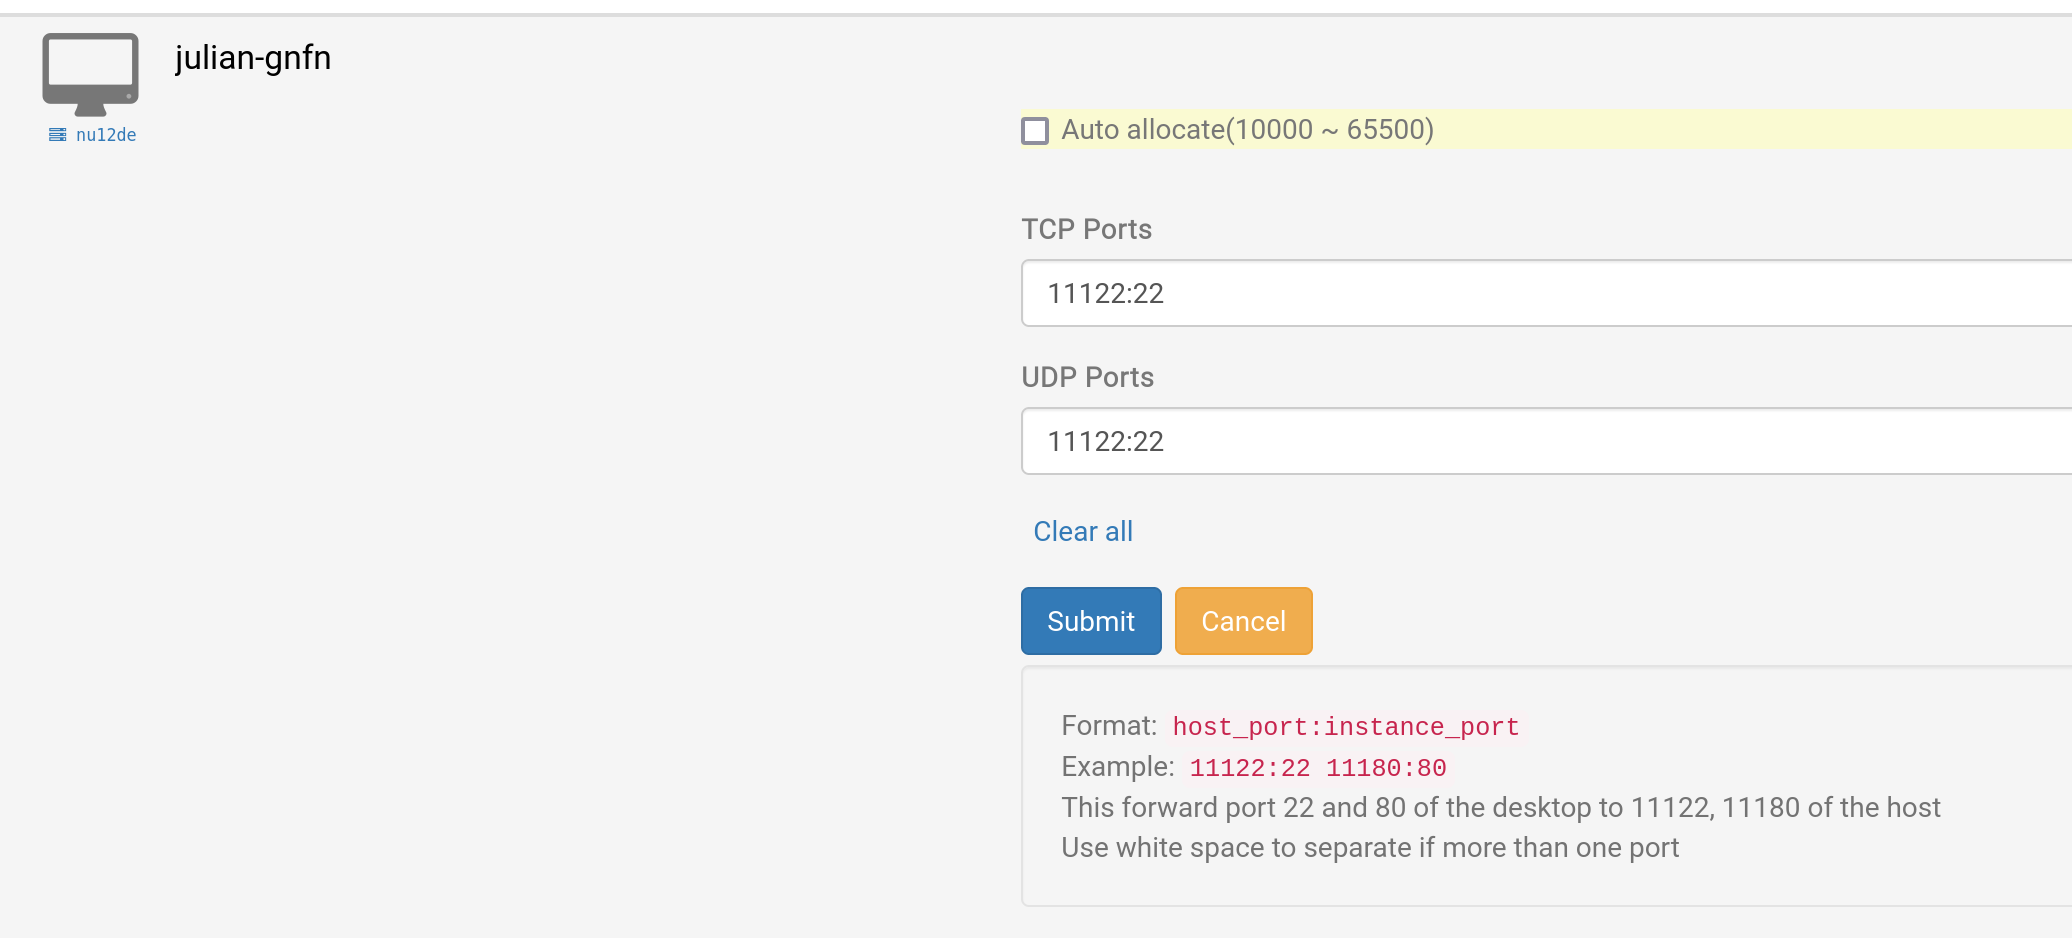
Manual Allocation
This example demonstrates forwarding port 11122 for both TCP and UDP protocols to the cloud desktop's VM port 22 for SSH. You can select different ports for TCP and UDP if necessary.
Example for Windows RDP
This example sticks to the traditional manual allocation approach, but automatic allocation is equally applicable.
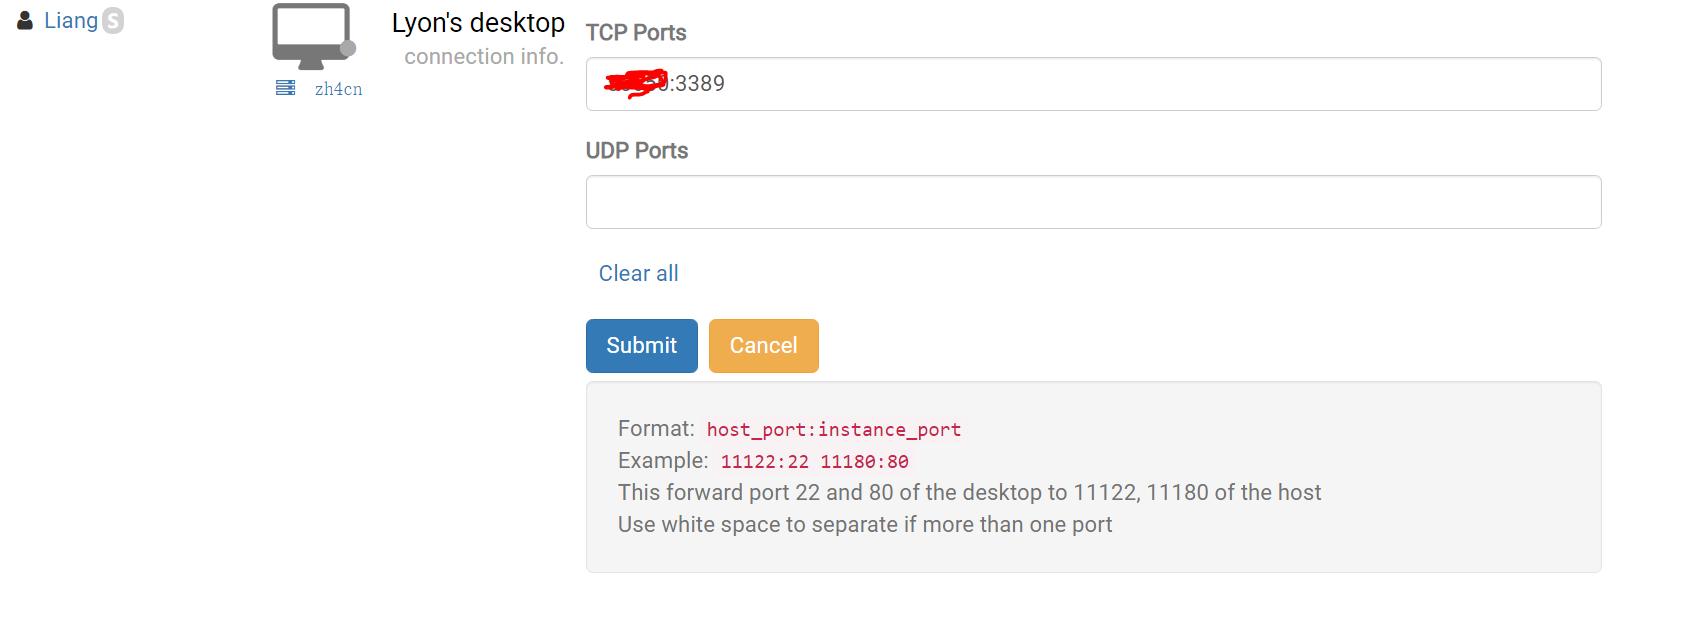
1. First, locate your DaDesktop desktop and click 'Port forwarding'. Then specify your TCP ports for the remote connection: the external port number and 3389, like 66666:3389. Make a note of your port number; if you lose it, simply revisit the Port forwarding settings.
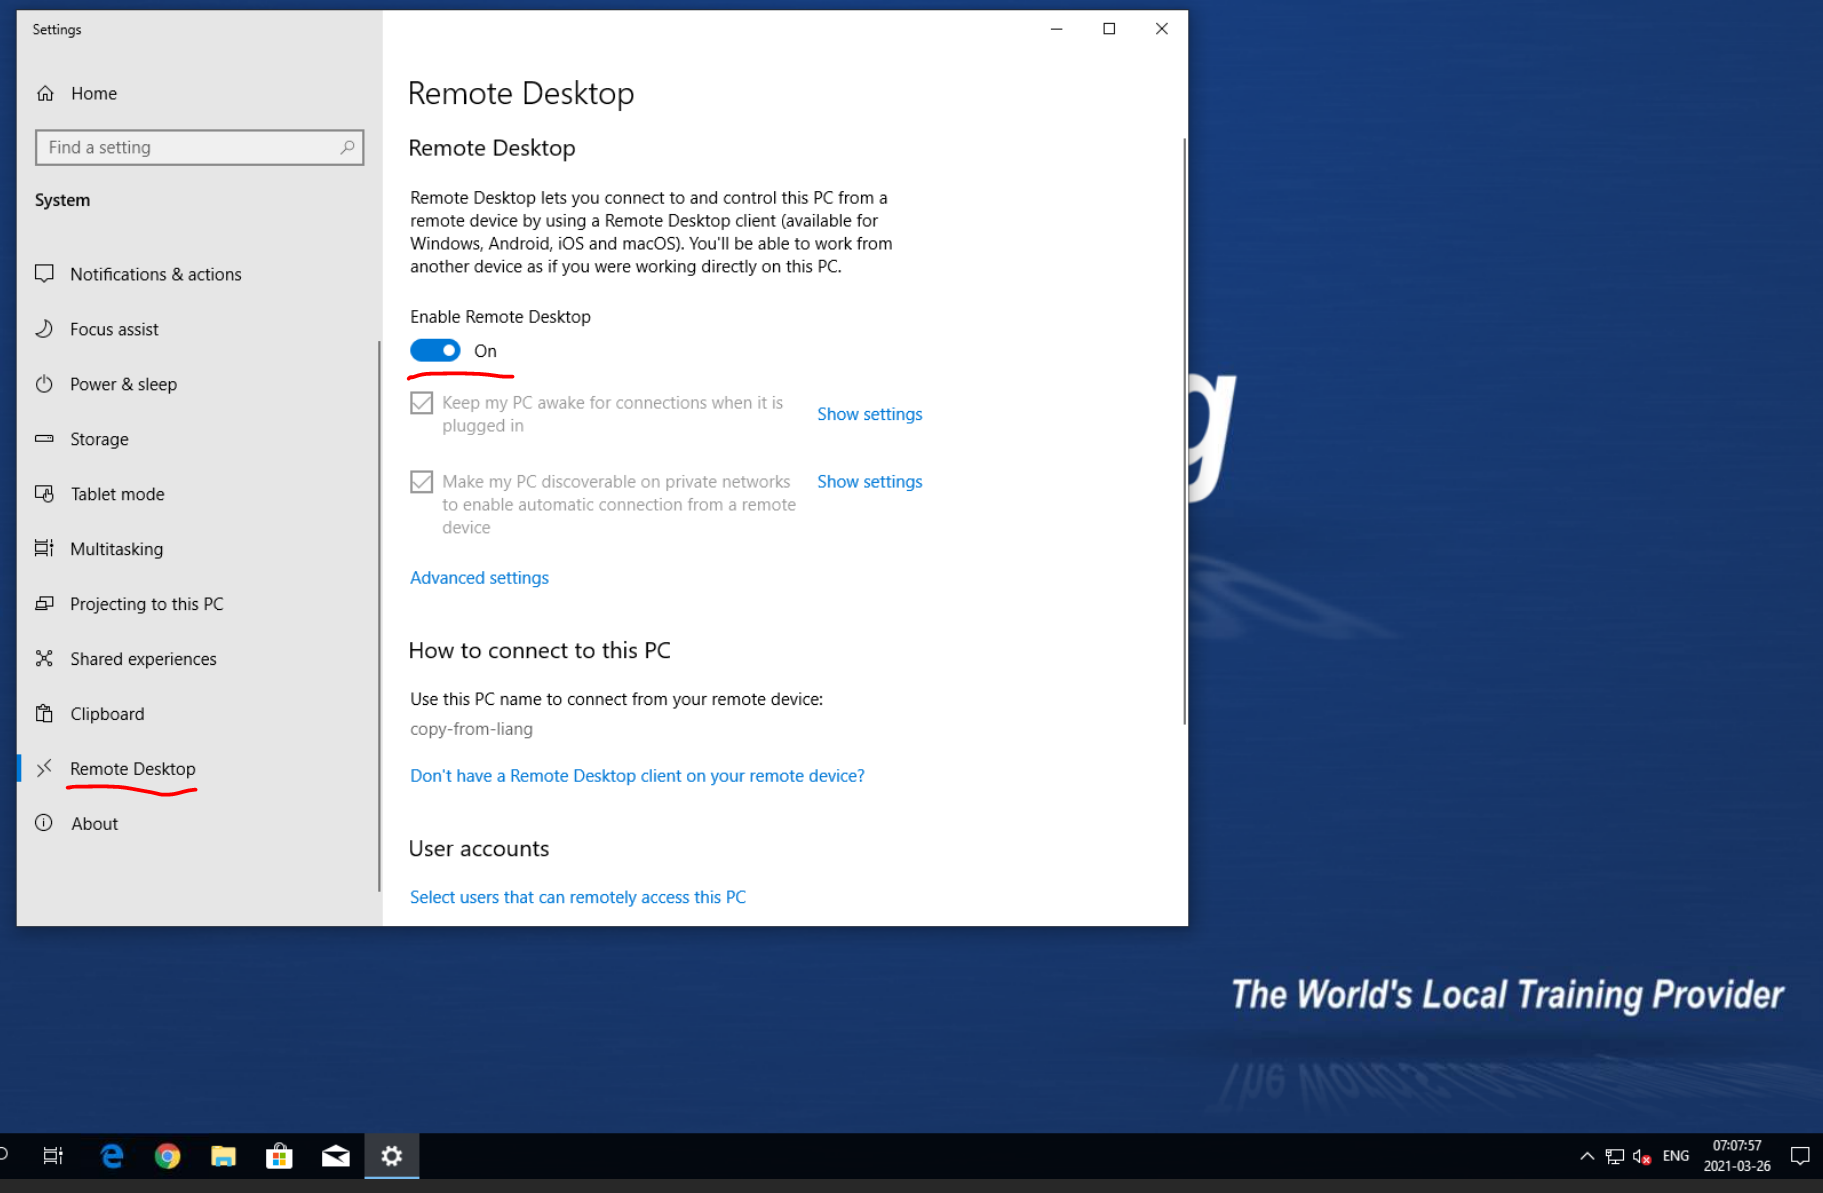
2. Next, submit the settings and establish a password inside your Windows DD machine, then select 'Enable Remote Desktop'.
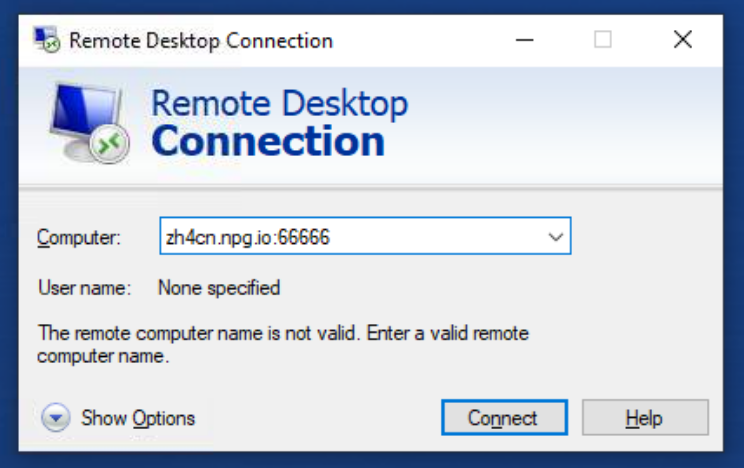
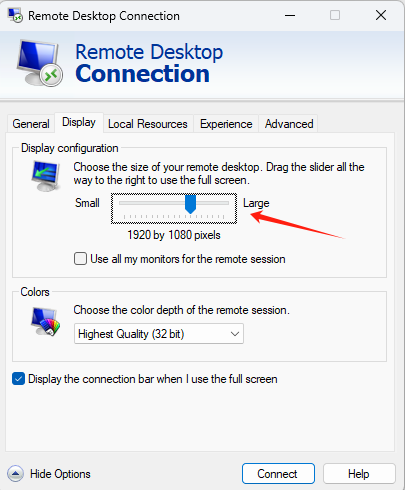
3. Now, return to your Windows device, launch Remote Desktop, and enter the server name plus the TCP port. For instance, if using zh4cn, it would be zh4cn.npg.io:xxxxx. Under 'Show options', you can also pick the desired resolution for your remote desktop window.
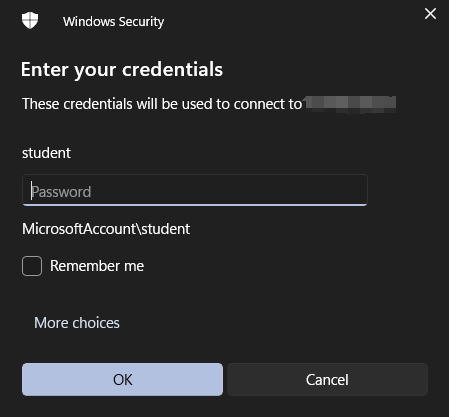
3.1 To log into your DaDesktop remote desktop, note that by default you'll need to reset your username and password within the machine before connecting.
"You must first reset your username and password within the machine."
Then connect the remote desktop.
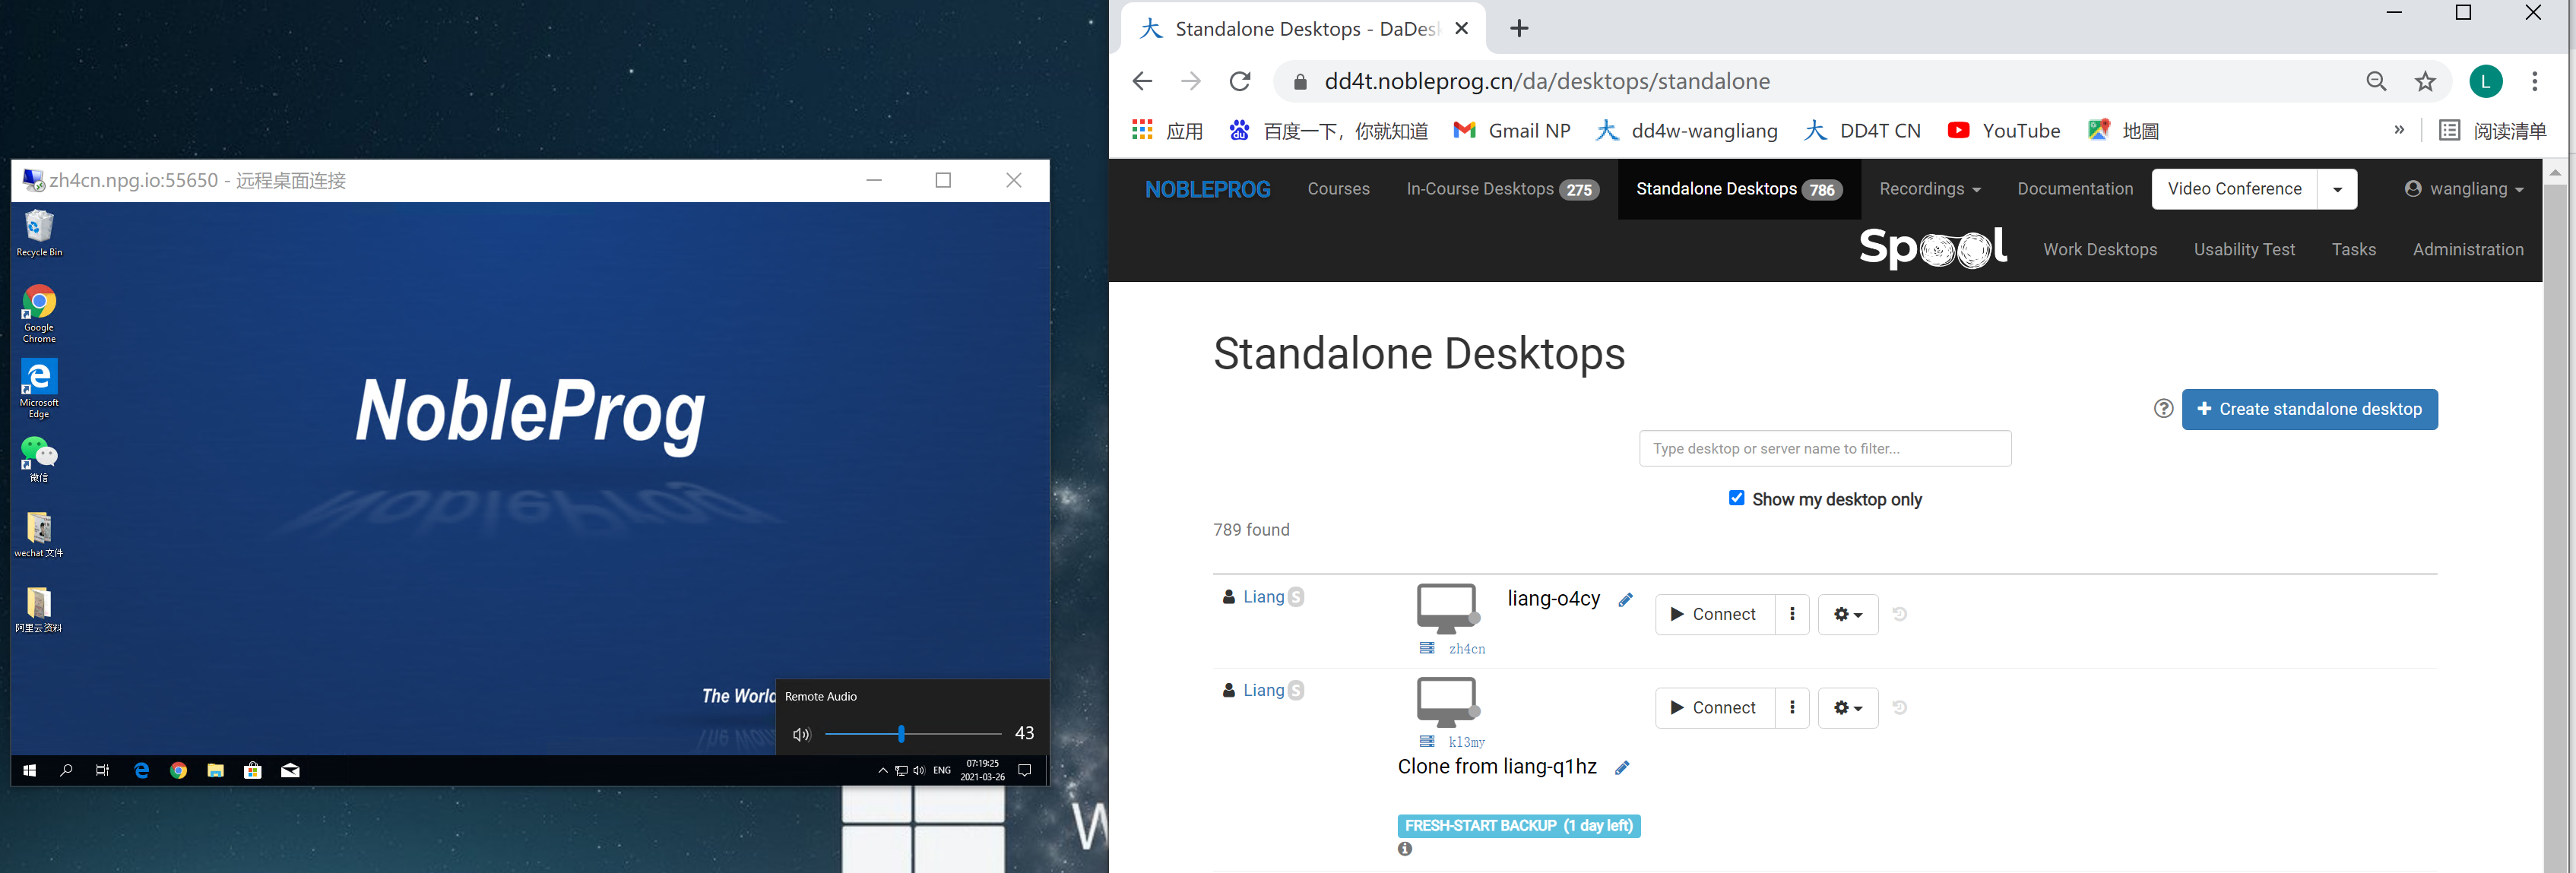
4. Finally, you'll have a remote desktop session that utilizes the DD template and your device's own sound card, making it easy to copy, paste, or output documents. (Small window on the left: DD remote desktop with audio.)